| Home Bronze Process Sculpture Custom Blades Other Services Contact |
The Original
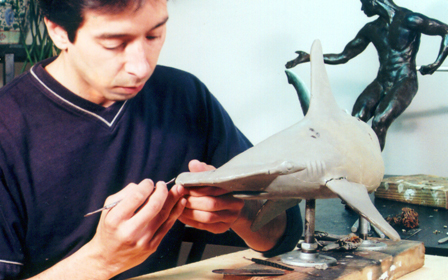
The first step in making a bronze is sculpting the original. This is commonly done in clay or wax but can be done in other materials such as wood, plaster, or foam.
An internal support, called an armature, is often used to support the structure.
The original is then prepared for the molding process. This may include sealing the surface against reaction to the mold material and for large or complex pieces, cutting the original into smaller parts.
If the original is a maquette, meaning that it is a model for a much larger sized bronze, it will be enlarged before being prepared for molding. This can be done by the original artist or by skilled sculptors working at the foundry. It's even possible to have the original scanned into a computer and cut by machine out of foam and then sprayed with a thin layer of clay. Regardless of who does the enlarging, the original sculptor will generally do the finish detail work on the enlargement. Enlarging can take weeks or more and for a life sized piece can cost several thousand dollars. |
|
 |
 |
Molding
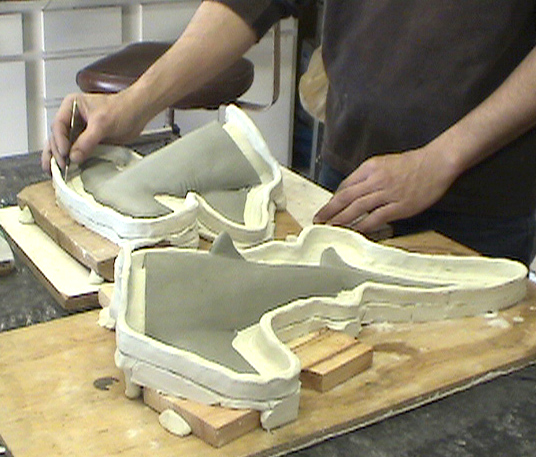
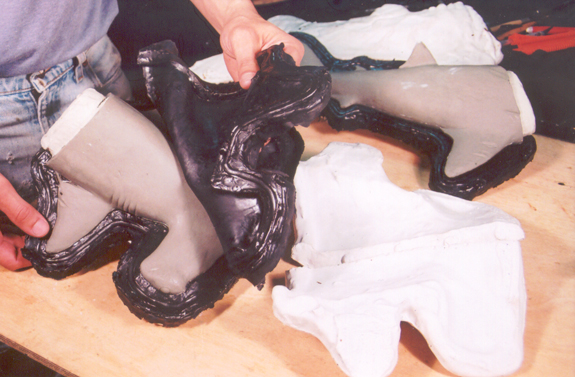
A mold is then made, usually consisting of a flexible rubber inner mold surrounded by a stiff outer mother mold. The flexible rubber allows the original to be removed without damaging the surface of the mold. Subsequent copies of the original can then be pulled from the mold without damaging their surface details. A simple relief sculpture may only require a simple one piece mold while a more elaborate sculpture can require several different molds, each consisting of several pieces by themselves.
A complex mold can take several days to complete and the rubber must be fully cured before the mold is put into use. |
|
 |
 |
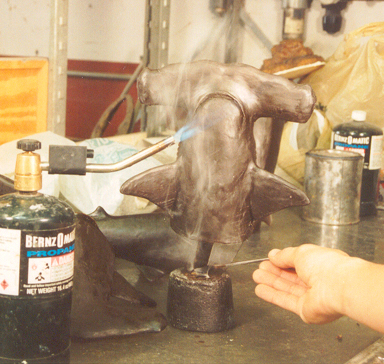
Wax Work
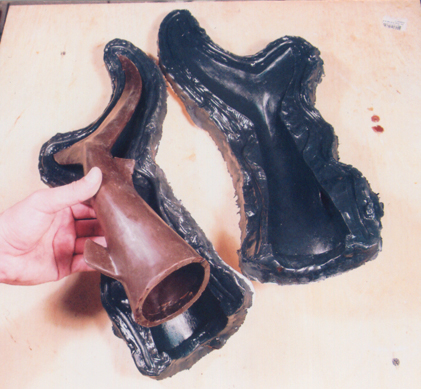
Microcrystalline wax, heated to a liquid state, is then poured into the mold. A very small mold can be poured solid, with care taken to avoid air entrapment in any high points. Larger molds must have the waxes poured hollow. This is done by pouring the wax in and out again three to four times until a hollow wax of the proper thickness is achieved. This is done while carefully controlling the temperature of each wax layer as well as the time the wax sits in the mold before being poured back out. Very large molds will have the wax brushed in by hand and slowly built up to proper thickness.
When the wax has cooled, the mold is removed to reveal, ideally, an exact copy of the original sculpture reproduced as a hollow wax casting. Perfection being rare in this step, the wax is then "chased" to remove any flashing and to correct any flaws created during the molding or casting steps.
The finished wax is then "gated" with the addition of runners, sprues, and a pour cup. That is, wax rods or tubes are attached to the wax casting at various points to provide channels for the molten bronze to flow at a later stage. These channels all terminate at the pour cup, which is where the bronze will ultimately enter the system.
|
|
 |
 |
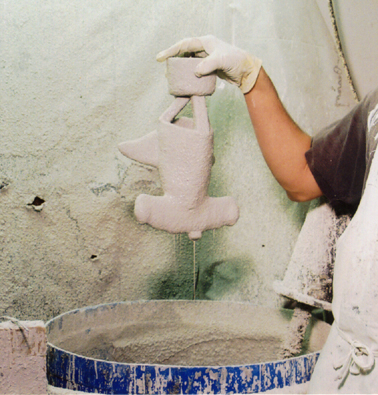
Slurry Room
The gated wax is then "shelled" by a process of dipping the wax into a ceramic slurry and then coating it with a fine layer of silica sand. It is then set aside to dry and then the process is repeated until a shell of suitable thickness has built up. This can take a week or more, depending on drying conditions and the number of layers a particular shell needs. This is the ceramic shell process. Other processes which can achieve similar results are solid investment and, to a lesser extent, green sand casting. |
|
 |
 |
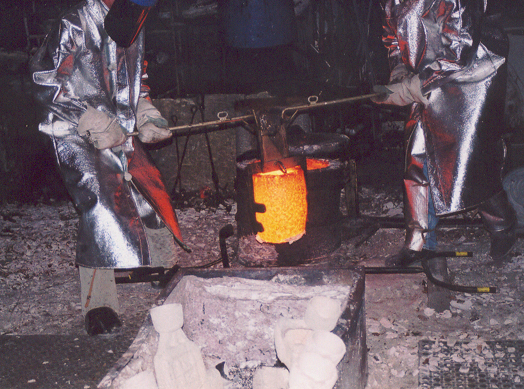
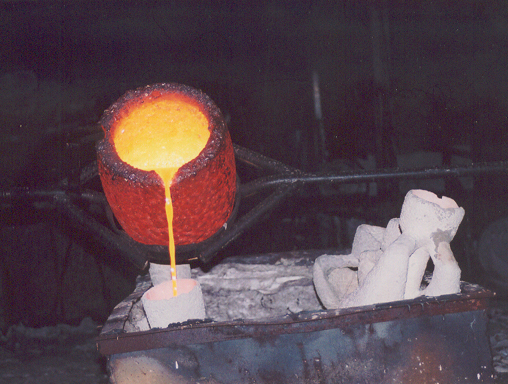
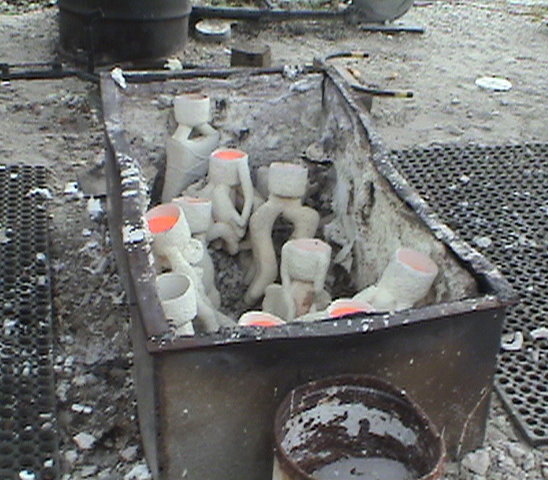
De-wax and Pour
The shelled wax is then fired in a high temperature kiln which will harden the shell while burning out the wax sculpture. (thus the name "lost wax).
The inside of the shell is now a negative of the original sculpture. The empty ceramic shell is now inverted so that the pour cup is up and it is again heated in preparation for accepting the molten bronze. Bronze, which has been melted in a crucible at around 2100 degrees, is then poured into the hot shell. This will create a bronze positive. |
|
 |
 |
 |
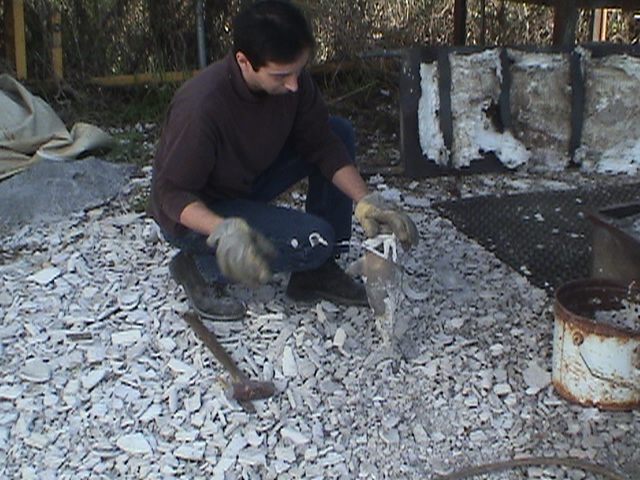
Chipping out, Chasing and Metal Work
When the bronze has cooled, the ceramic shell will be broken off with a hammer and/or chipped out with air tools. The surface of the bronze will then be blasted clean with sand or glass bead.
The chased and gated wax positive has now ben reproduced as a bronze positive including all the runners, sprues and the cup which are now, inconveniently, made of bronze. These extra pieces must now be cut off the sculpture.
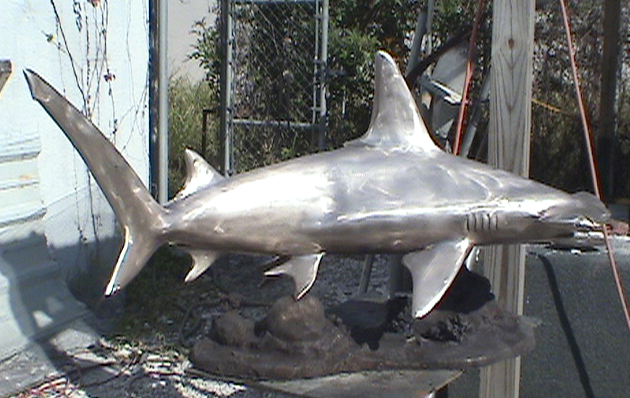
If the sculpture was cast in more than one piece, it is now welded together. Special bronze rod is used for this that is made of the same alloy as the bronze that was poured to make the sculpture. In this way the welded together sculpture becomes one homogeneous whole. TIG welding is ideal for this though it's possible to MIG or oxy/acetylene weld bronze as well.
Then the bronze is chased to remove any traces of the gates and welds. The bronze sculpture should now be a perfect duplicate of the original sculpture. |
|
 |
 |
 |
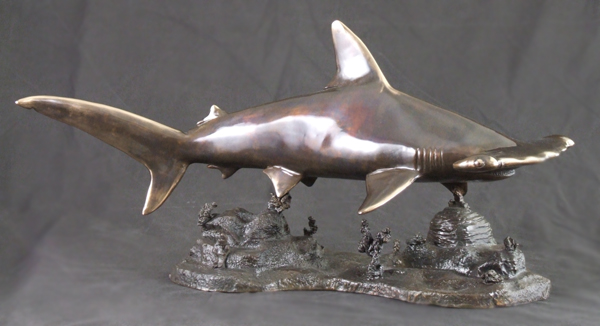
Patina and Mounting
Finally, the patina is applied which gives each piece it's individual coloration. The patina is a controlled oxidation of the metal's surface. In some cases metal dyes can also be used which will give a piece bright colors that could not occur on the metal through normal aging or patination. The surface of the bronze is then sealed with wax or lacquer. If required, the finished sculpture is then mounted on a base of marble, other stone, or wood.
|
|
 |
This is a very brief overview of the process. Many of the minor details and tedious minutia have been left out. It should still give the reader an overall understanding of the bronze process and what is involved in going from an original sculpture to a finished bronze. Normally, each of these major steps is done by separate skilled artisans who are specialized in that particular area of the process.
|
|
